Sometime last year, my wife was complaining to me that our “guest room” was in fact, a storage room, and the den was crazy cramped. Basically, we had a giant L-shaped desk in there, storage units, AND an exercise machine crammed in there, while in the “guest room”, we had a crammed queen sized mattress, surrounded with our storage items with no room to move. All of my art books were in the bookshelves in that room, away from the den. Not the most convenient setup.
So I took the hint, and we swapped the two rooms. Now, both rooms are functional, and a lot of clutter was removed.
I also had two Ikea Lack shelves in the den that needed to be removed, and re-mounted in the other room.Today, I’ll be talking about how to mount a Lack shelf, obviously for the purposes of displaying anime figures! (was there any other reason?)
Lack shelves are very nice, very cheap, and very versatile. They come in various colors, so for sure it can make the statement you want. You can also mount under-mount lights to them with absolute ease. The dangling wire option was something I debated about – have it hanging free, or fish it through the wall? Aesthetically, fishing it through the wall would have been better, but it wasn’t worth the effort, or the damage it would cause in my opinion.
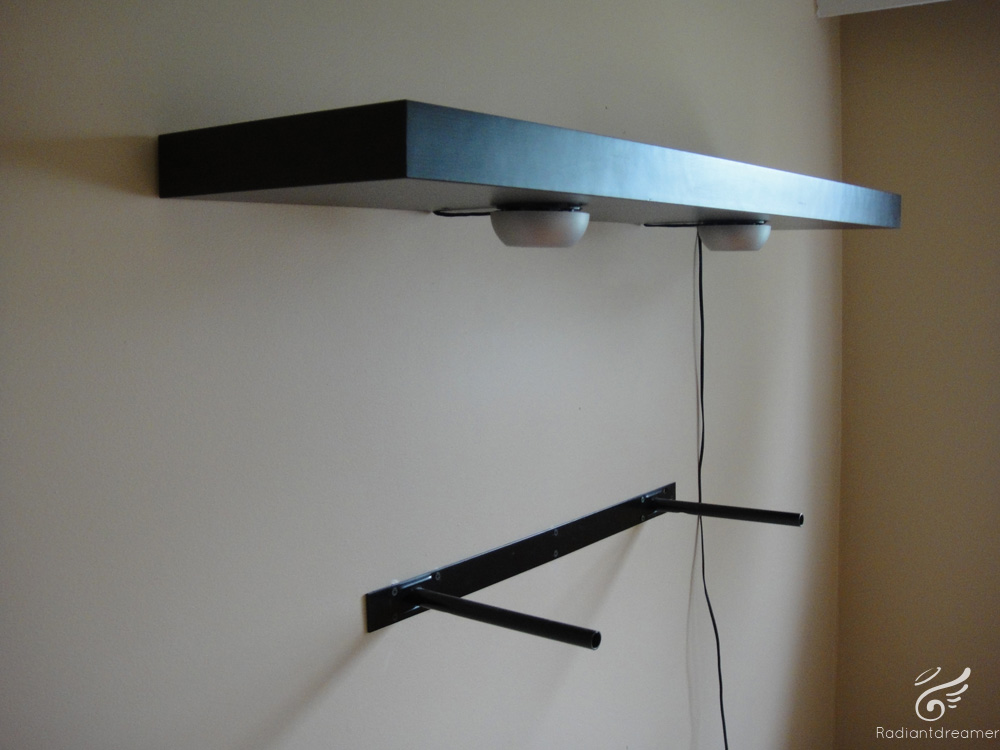
Lack shelves come in two parts – the metal mounting frame, and the wooden shelf that slides right into the mount. The versatility comes if you want to change the shelf color – you don’t have to remount anything!
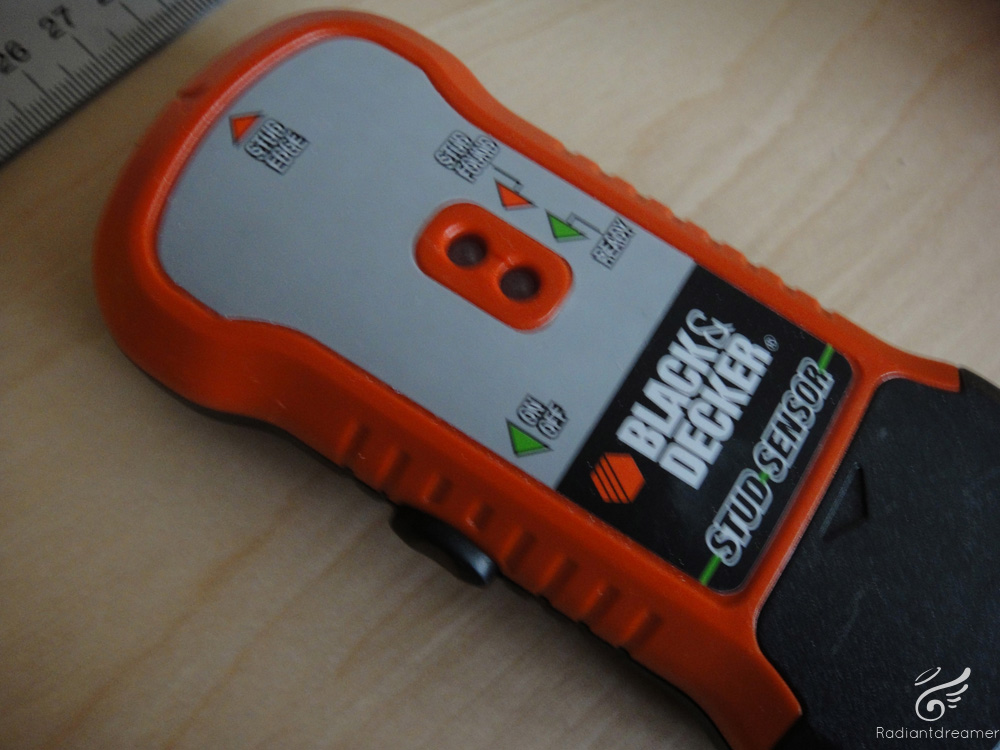
This is a stud finder. It beeps every time it scans me. har har har.
It’s absolutely imperative that you mount the shelf to at least one stud. A stud is basically a structural beam in your wall that keeps your walls standing. In North American standards, there is one stud every 16″ apart. It seems like that’s not the case in Sweden, because the holes in the Lack mount do not match that. But that’s okay, you really only need one stud mounted.
The reason why you want to mount into a stud is so that your shelf won’t fall off due to the weight. You see, if you simply mount the shelf into the drywall, it will fall off because drywall is a weak crumbly substance, and it’s thin.
This may sound intimidating, but trust me, it’s not. It’s very easy to do. I’ll talk about how to drill holes without destroying your house.
Using the stud finder, you scan across the wall, and when it finds a stud, it will beep. Such amazing technology! It’s based off of proximity sensoring – it sends out waves that bounce back, and when those waves get blocked, it’s found the stud. Of course, since it’s proximity based, accuracy isn’t the highest, so be sure to thump the wall to find where it feels most “solid”.
These are wall mounts. You will need these for the sections of wall that cannot be mounted due to lacking of studs. This solution isn’t as strong as actually mounting on a stud, but it’s strong enough.
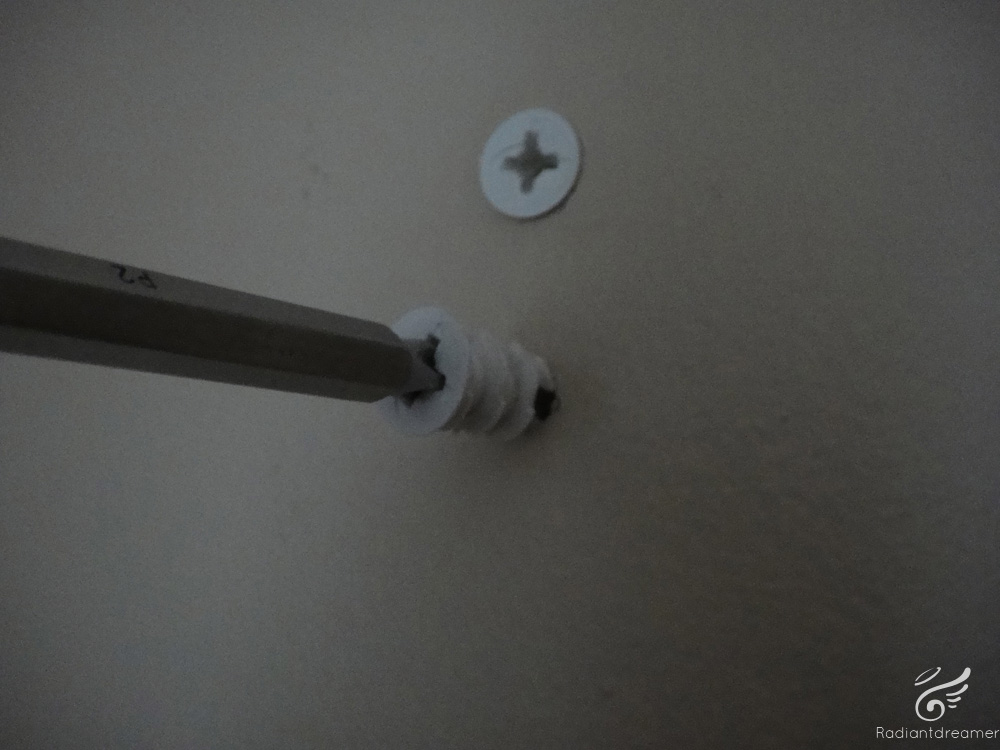
What you do with these is drill a pilot hole into the wall, and screw these in. They will basically reinforce the hole for your screw so that it doesn’t fall out. When you put your screw into this wall mount, the wall mount expands, further keeping your shelf in place and secure.
Please note, that if your home is made out of concrete (like a lot of the houses in Singapore) then you don’t need to use a stud finder, but you most definitely will need to use these wall mounts. You’ll have to drill through concrete, but again, that is not a hard task. I will talk about how to do that.
Once you’ve found a stud, mark it with a pencil at around the height you want the shelf mounted. Next, bring up the mount, and line up one of the holes with your mark. It really doesn’t matter if the stud happens to be on the left, right, or center of the mount.
Next, take a leveler (shown above), and use it to align the mount straight. With the mount lined up, use a pencil to trace the holes onto the wall. (see picture below), and put the mount on the floor.
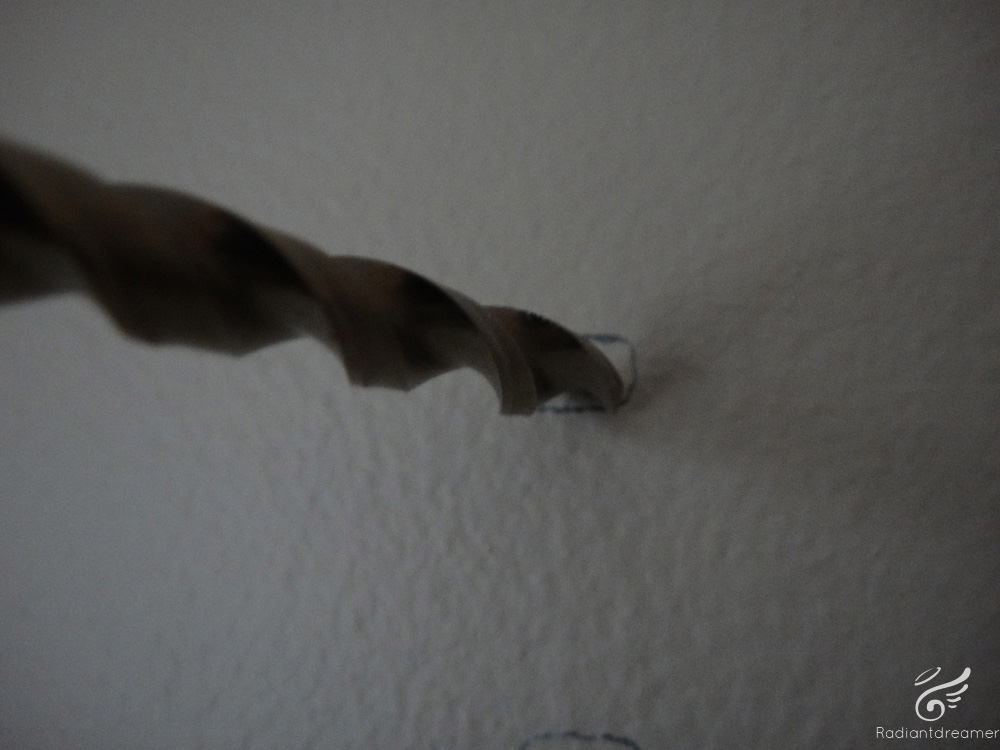
As you can see here, I’ve traced an oval marking that matches the placement of the mount’s hole. For the screws that will be screwed into a stud, those plastic wall mounts won’t be necessary. But to make it easier, I will drill a pilot hole. A pilot hole is essentially a hole that is much smaller than the screw, and is used for the purpose of guiding the screw. So take a drill bit that’s much smaller than your screw, and drill it in to the stud, pull that out, and repeat for the hole directly below. It’s VERY important that the drill bit is smaller than the screw, otherwise the screw will have nothing to thread!!
Also note, that if the drill bit goes in easy with little to no resistance, then you know you did not hit a stud! You’ll have to re-measure again! You’ll know you hit a stud if you find resistance when drilling.
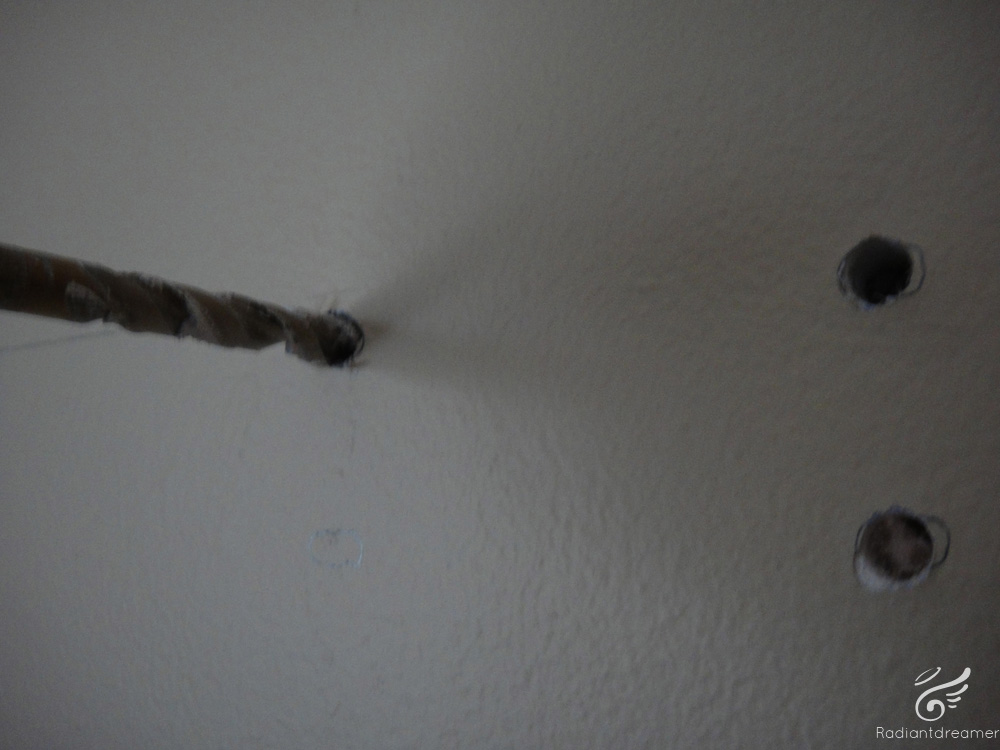
For the plastic mounts, you want to drill a pilot hole as well. Most likely, you’ll be using a bigger drill bit. Don’t make it too big of a hole. You can see some of the insulation in the bottom right hole.
If you are drilling directly into concrete, the type of plastic wall mounts will not be short and stubby like the ones I have. They’ll be longer and thinner, and the pilot hole will also be bigger (it should actually be about the same size as the plastic mount).
You won’t need a special drill different from the usual hardware drill, but a hammer drill will make it easier (I bought a DeWalt hammer drill a while back. It’s sweet!) The drill bit you use may also need to be a special drill bit meant for drilling into concrete. But otherwise, drilling will be exactly the same method. (you’ll just have a harder time!)
With the pilot holes drilled, it’s time to put in the plastic mounts. The type I have are screw-in types. But you can also use the long threadless type (they look almost the same as the ones used for concrete).
With these screw in types, you cannot (repeat cannot!) use a drill. Hand screw it in.
The long threadless types need to be hammered in. If you’re mounting into concrete, you’ll also be hammering the mounts in. You may have to re-adjust and make your pilot holes bigger, but it won’t be as difficult since the hole is already there.
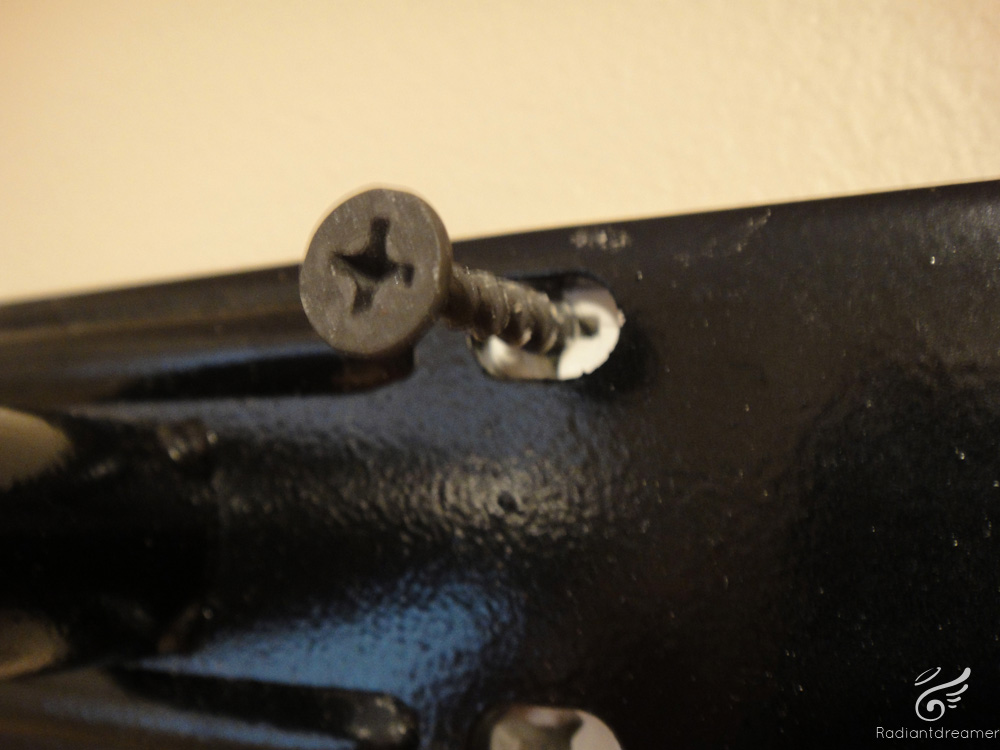
With the plastic mounts screwed in, put your wall mount back up, and begin screwing in the screws. Again, DO NOT DRILL! Hand screw them in. It should be pretty easy. DO NOT OVER-TIGHTEN!!
Use your leveler to make sure your mount is level, and adjust the screws as necessary. You do have a little bit of wiggle room.
Next is the lighting – What I did was measure the distance from the edge to where I wanted the light to be, and marked the back of the shelf. I then used a cutting knife to put a small “relief” for the wire.
I then measured from that point outwards to where I wanted the light to be mounted, noting the length of the wire as my indicator. Taping that down, I repeated it with the light on the other side.
After ensuring both sides are equal, I drilled it into the shelf.
NOTE: Make sure you’re mounting the lights on the underside of the shelf, and not the top! (the underside has two small holes) Also, don’t cover those two small holes!
I then taped the wiring to the back of the shelf (there’s room) and just arranged it however it would fit. Keep the two large holes clear because that’s where the wall mount slides in.
After that, simply slide the shelf into the wall mount, and fasten the screws to the bottom of the shelf (you know those two small holes) and YOU’RE DONE!
If you ever have to remove the shelf for some reason, you’ll need to be prepared to fix the holes.
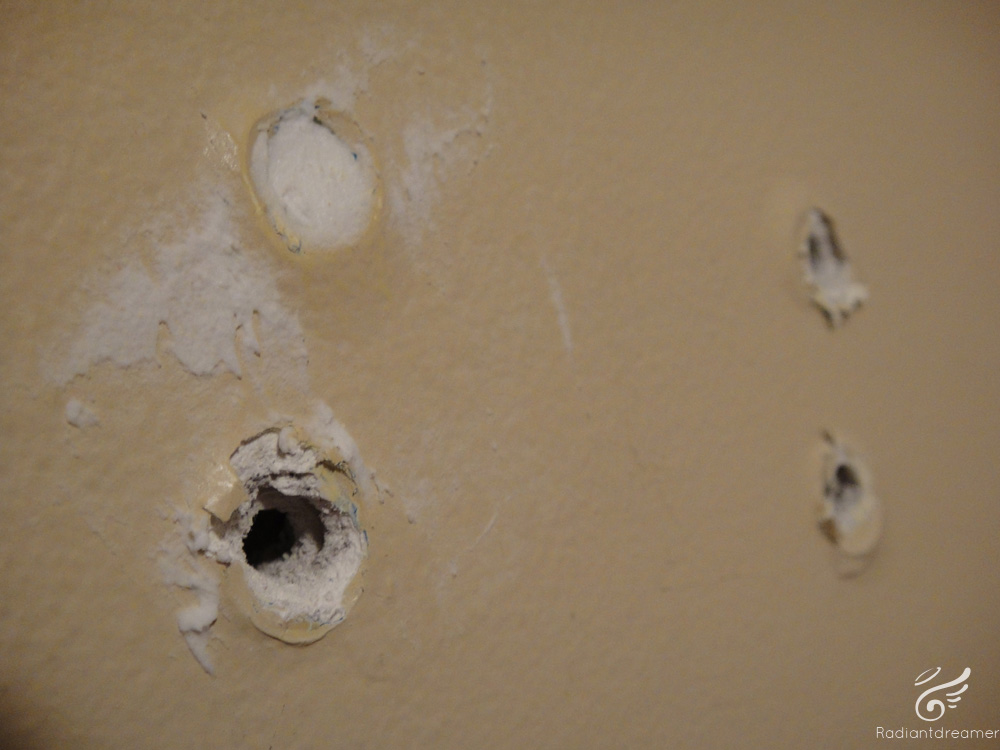
If it’s drywall, the solution is simple – lightly hammer the hole in slightly for a very mild divot, and then use wall repair paste to cover it. You’ll have to smooth it out later with sandpaper after it dries, and then paint that section of the wall with the same color. If you do it right, it will look as if those holes were never there!
For concrete walls, you’re kinda hooped… sort of. You will have to unscrew the whole thing, and then drill through the plastic mount before putting some wall repair on it and painting. It might not look as flawless as drywall though, so be prepared for that.
So there you have it! A beautiful display shelf for your beautiful figures! In the end, doing this is well worth the effort!
Good luck!
Last week, I asked people to mention what their favorite JRPG was on DS. The reason I asked was to insure the prize went to someone that owned a DS, and liked JRPGs. No point sending a prize to someone if they can’t use it!
Neorecon19 wins this copy of Magical Starsign. A great little RPG that’s in practically mint condition! Thanks for participating!







 Read more!
 Read more!

Oh nice idea with those lights~ gonna create something like this soon, but with glass plates… (i love glassed shelfs….)
Maybe I’ll try to install some LEDs to make the glass glow “itself” :>
Thanks!
Hey glass plates are an awesome idea! Mainly because light can shine through the shelves onto the shelves below. It’s definitely a different kind of look.
Ikea also sells those LED shelves that make the glass glow. 😀
Oh really? gonna check that out today lol
Hm yeah, if you put one plate with lights on top and use this “shine through” effect it would diffently look awsm
I use LACK shelves for my books, but I’m regretting the choice. It said it could support the weight, but the truth is they don’t 😛 They’re perfect for light stuff though and I love what you did with the lights. It looks really classy 🙂
Were the shelves installed into studs? If not, then too much weight will just cause it to fall off the drywall. I guess it’s possible that the shelf could collapse onto the rods because the thing is essentially hollow inside…
Yikes, I’d probably tear the room apart if I attempted this! (I’ve put my foot,head and a hand through drywall before multiple times!), but they do make the figures stand out better when you equip the lights to the bottom!
I really can’t wait to try the game out!
HEAD?! Do share this tale!
The lights really do make a HUGE difference!
No problem, though it is pretty stupid. I was having one of those really crappy days where nothing was going right at all and it got to the point were I as so frustrated that I banged my head against the wall and put a hole in it the size of my forehead.
(BTW, finally got my first blog post up!)
oh wow. You’re lucky that you didn’t hit a stud. Those things are only 16″ apart. That would have been a lot more brutal.
Grats on your first blog post! But it looks like your blog doesn’t exist…?
Figures I forgot to that I had an extra word in the url. I’ve almost got it to the point where everything is pretty much the way I want it, but there are still a few setting that aren’t working the way I’d like them to. I’ll have to dig them out when I find the time to do so. I’m also glad I’ll be able to catch your next posts while I’m on vacation.
Haha, what a nice description at here.
Teach people how to make some holes at the wall and screw all of it by using drill…LOLX Just kidding ^^
But about to fix those holes, I may not use the same method as you are, instead of it, I usually will cover up with some shelf(book shelf???wardrobe???whatever) BUT usually it does not contain anything inside, or maybe will put some.
lol! yes! destroy your walls! 😀
Covering holes with a shelf or something doesn’t work for me, especially when I want to leave that wall empty. Patching is pretty much necessary.
Ya. You got a point.
Then the place with those patched holes now placed with wad?? Exercise machine??? >< Or just leave them there???
After patching, I sand it down so it’s smooth, and then roll paint over it again so it’s as if the hole was never there.
Our house is full of drill hole’s because of my dad(now we have a free airconditioner because of the hole’s)
my dad is the one who make the shelf for my figure’s.
Now i dont have to ask him :DD
thanks
Well, maybe this tutorial can help your dad out? ^^ He really should patch those holes up. It’s not good to leave them like that – it ends up leaking air, which increases your heating bill in the winter. Not to mention the insulation is fiber-glass, which isn’t good to breathe in.
Great advice! It looks very neat and pretty– must’ve took a while to actually finish it. Do you buy most of your stuff from Ikea? Thanks for sharing!
Thanks, einen! It took about 45 minutes to install these shelves, I think. 🙂
I hate to admit it, but yeah, it seems like the majority of my furniture comes from Ikea. ^^;
Nice tutorial! Even though I pretty much got lost in all the construction terminologies (and my sister runs a hardware. LOL ~_~; ) I haven’t seen a stud finder before. LOL. Probably because most buildings here are made of concrete too. XD I’ve seen a leveler before though, since my sister’s store sells those too ^^
I really wish there were IKEA furniture available here. 🙁 There’s just no good quality shelves with affordable prices. It’s either they’re just cheap, or freaking imported and expensive. OTL
Congrats to Neorecon19! Makes me miss my NDS now ;~;
Most buildings in Singapore are made of concrete too, I think… so yeah, stud finders might not be as common in Asia.
I wouldn’t consider Ikea “good quality”. I do believe you get what you pay for, and with Ikea, you get what you pay for! It’s not as cheap as well… cheap stuff, but it is sort of in between. It’s more stylish, but durability is just as bad as the cheap stuff, IMO.
What happened to your NDS?
I ummm… Lost it. ~_~; No, seriously I did. ;~;
was reading on how figurines were made, wanted to make it originally but ended up as seeing too much work so I gave up. lol…
sorry, not really sure what you’re referring to. ^^;
That looks pretty spiffy, I usually find that when people add lighting it ends up looking kinda tacky. I blame people’s lack of cable management.
You make it work, in fact you ended giving an idea on how to do it for my shelves. One problem though, getting those types of lights probably wont be cheap for me.
Which reminds I should really stop procrastinating and put up on some more shelves. I’m sure Selvaria and Momohime want to get out of their boxes.
Should have entered the contest, I don’t own Magical Starsign. Then again NDS games is definitely I don’t need more off. Stupid backlogs.
I think yes, cable management does have a lot to do with it, as well as the type of lighting. I have found that lighting does make a HUGE difference in the presentation.
The lights are from Ikea. If I recall, they’re only about $30 or something for a pair.
Hahaha you have Selvaria and Momohime? Could have fooled me! Get them out on display!
Well, better luck next time with the contests, I suppose. It’s not going to be the last time I give away a video game, I’m sure. Speaking of backlog, I just started playing No More Heroes 2. It’s an… interesting game. The beginning has been great so far, but the later parts, I’m not so keen on the lack of character development or plot…
I have a couple shelves mounted to the wall myself. I didn’t have a stud finder so I had to knock on the wall to find them.
Yeah, that works too… with a low amount of accuracy. 😐
Got pics of your shelf? I’d like to see them!
My sister has the exact same self in her room except for the lights, ^^ Was a hassle at first because i thought the shelf would come with its own screws but ye forgot its ikea ^^
Btw this post really is a coincidence because i just posted something shelf related as well! haha weird XD
I dont like to put my figures on a shelf = dust, I get so much dust everyday and sometimes dont have the time to clean so i prefer putting it in cabinet, mind you my touhou figmas are on a shelf ^^
hahah well, it seems that Ikea doesn’t like providing screws where there’s a chance that something would go wrong, like it falling off and damaging goods. They don’t want to be held responsible for that. I dunno. It’s weird. 😐
So the same one eh? Even the color?
Yes, that is the problem with shelves – dust. However, I’ve found that display cases also get dust in them, maybe not as much as on the shelf, but it gets bad all the same. I think it’s because it’s not air-tight.
I’ve been kinda scared to use LACK shelves, just ’cause the weight they can support is a bit iffy for me. Especially when I live in a house full of naughty cats that like to jump up everywhere! Apparently one of my cats can jump straight up from the floor to the top of the refrigerator, though this is a myth that I have not confirmed myself…
LACK shelf can support anywhere from 11-33lbs depending on fasteners used – My cats are about 11-13lbs each … so you can see why it’s a tad iffy for me. But I really do dig the minimal look, and I could use more display space for my figures… Hmmm.
I got my shelves from Home Depot and my boyfriend was kind enough to mount them all for me. He really did a great job. I’ll post pics soon.
I have lost the small screws that go in the bottom of the shelf in my last move. Can anyone tell me what size they are so I can replace them? Thanks!
Using mine to display all my Gundam!